Dialogues
All conversations are written in a Dialogue component. To create one, right click on the Hierarchy Panel and select Dialogue → Dialogue.
Add Component
Alternatively, you can select any existing game object and click on the Add Component button and search for Dialogue.
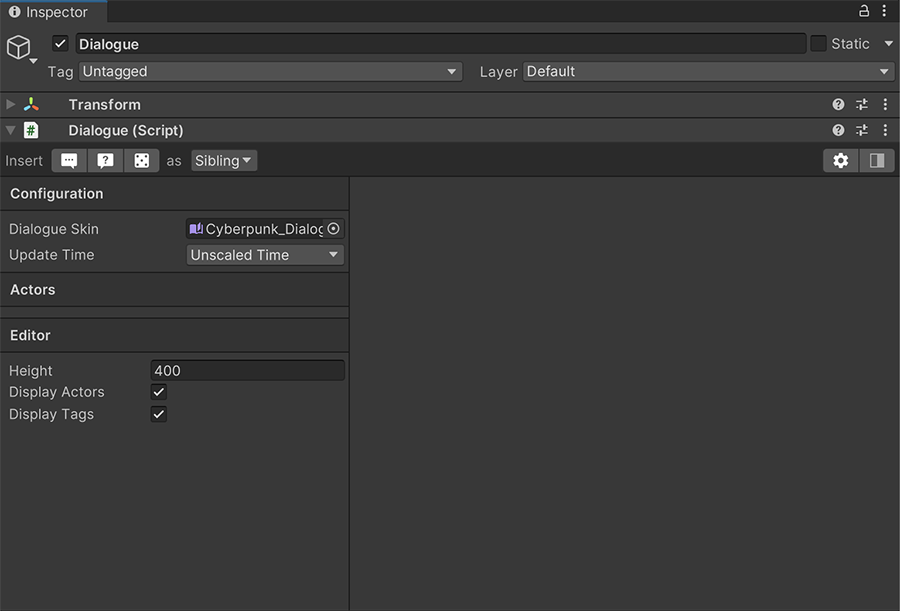
This is the basic view of the Dialogue component, and it's where all the text is written and configured. However, there are multiple sidebars and windows that can be hidden/shown in order to make it easier to work.
Anatomy of a Dialogue
The Dialogue component, fully expanded, has 4 different sections, two of which can be collapsed to increase the amount of space available when these are not needed.
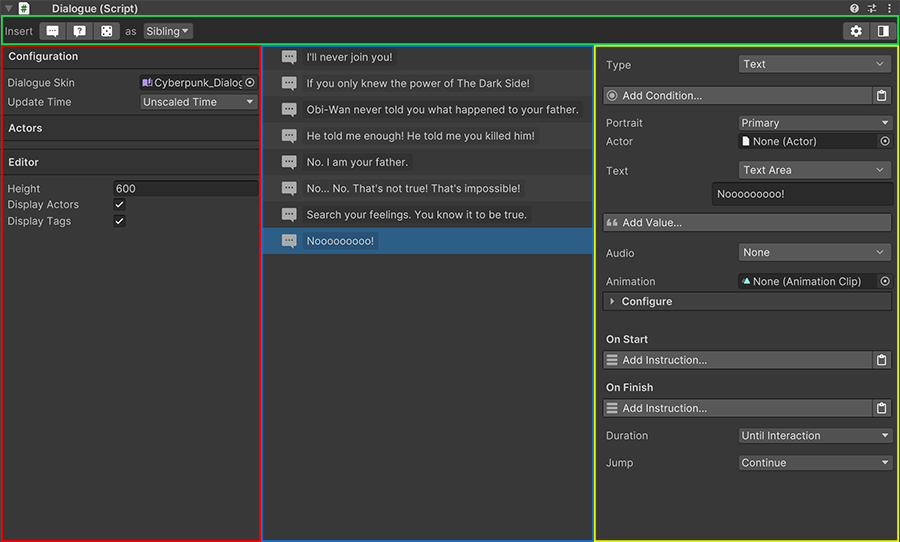
Top Toolbar

The top toolbar has two distinct sections.
The buttons on the left allow to add new nodes to the conversation. These nodes can either be:
- A Text element, which is the most common type. It displays a text on screen.
- A Choice element, which allows to present a choice to the player
- A Random selection element, which is similar to the Choice element, but automatically selects a random value.
Shortcuts
Holding the 'Shift' key while clicking on any of the buttons will perform the opposite operation stated next to the buttons.
For example, clicking on a Text node that is set as a Sibling, while holding the Shift key, it will create a new node as a Child of the current one.
To learn more about the different nodes, head to the Nodes section
This section also allows to select where to create the new element. By default, it will always create it right below the currently selected entry, as a sibling. However, this can be changed to create a new element as a child of the selection.
On the far right there are two toggle buttons.
- The first one with the gear icon, toggles the left sidebar, which is the Settings window.
- The second one with the square, toggles the right sidebar, which is the Inspector window.
Settings
The Settings window allow to configure the general values of the current conversation. There are 3 sections:
- Configuration: Determines the skin used by the Dialogue when displaying the conversation, as well as whether it is affected by the time scale or not.
- Actors: This section is automatically filled when new Actors are added or removed, and allows to link a scene reference with the Actor.
- Editor: This allows to customize how the Editor looks like, in order to have more real estate and work more comfortable. These options have no impact on gameplay.
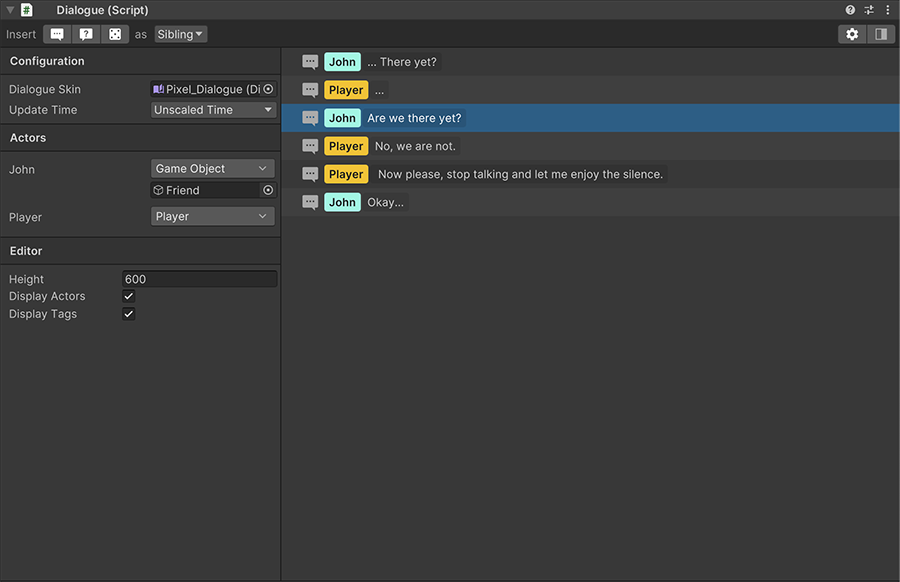
Conversations
This section is the most important one, which allows to overview the whole conversation flow at a glance. Each row is a spoken dialogue line, and they are executed from top to bottom, and examining the child nodes first, before jumping to the next sibling.
Double Click
Because opening and closing the Inspector sidebar is a very common operation, double clicking on any node will open (and focus on the current node) or hide the sidebar.
Inspector
The inspector sidebar allows to set and modify the currently selected node of a Dialogue.
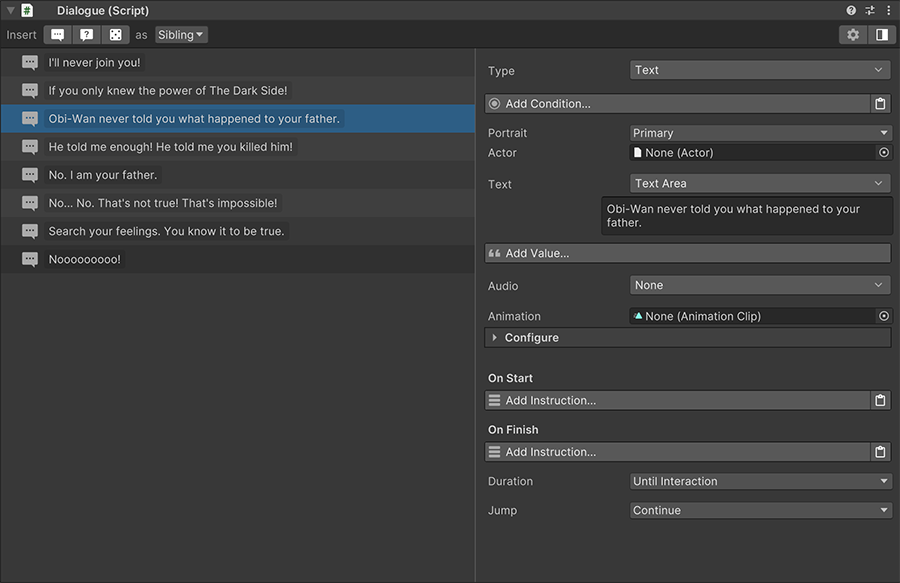
Starting from the top, any node allows to change its type, which can either be a Text, Choice or Random.
Node Types
For more information about node types, see the Nodes section.
The Conditions list below determines whether this node can be executed or not.
The Portrait field allows to choose where the Actor's portrait is displayed (if any at all). It allows three options:
- None: No portrait is displayed. This is the default option.
- Primary: The primary position of all portraits.
- Alternate: An alternate position where to show the portrait, if the skin supports it.
The Actor field allows to reference an Actor asset. If one is provided, it also allows to choose which expression to use for this dialogue line (if any are available).
Actors
Note that whenever an Actor field is modified, the Dialogue component re-scans the whole conversation tree and gathers which Actors are being used, which can be configured in the Settings sidebar.
The Text field is probably the most important one, and it defines the text displayed by the dialogue.
There's a button below that reads Add Value..., which allows to create a list of key-value pairs. These values can be used by the text to add dynamic values. For example, displaying the real name of the Player saved in a global variable.
More about Dynamic Values
Dynamic values are incredibly powerful. Read more on how to use them at the Dynamic Values section.
The Audio field, as it name implies, allows to use a voice clip while the text is being displayed.
The Animation field allows to choose an animation field, which is played on the object linked to the current Actor. If none is provided or the scene reference is empty, the animation is ignored.
Animation Timeline
The Animation field is more powerful than regular Gestures, as it allows to play instructions at any point of the animation.
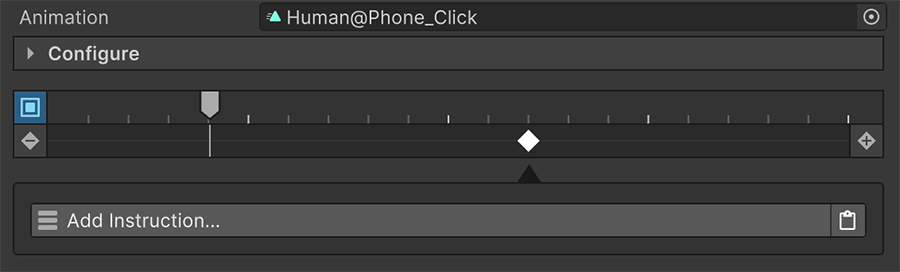
For more information about the animation timeline tool, see the Animation Timeline section.
The On Start and On End instructions are executed when the text starts to display and disappears, respectively.
The Duration field determines how long the text will stay on screen. By default, it waits until the user presses any button to jump to the next line. However, this can be changed with one of the following options:
- Until Interaction: The default value. Waits until the element is ordered to skip to the next line.
- Timeout: Waits until the specified time has passed.
- Audio: Waits until the specified Audio Clip finishes playing.
- Animation: Waits until the Animation Clip finishes playing.
No Audio or Animation
It's important to note that if Audio or Animation are selected, but no asset for those values are present, the duration will be zero seconds and will skip immediately to the next text line.
The Jump field, by default, indicates the next dialogue line to play is the natural one (child if any, otherwise the next bottom sibling). However, this field can also be changed to jump to any arbitrary point marked with a specific Tag, or even exit the Dialogue after the current line is executed.