Localization
The Unity Localization asset allows to manage and show a game translated to two or more languages.
Documentation for Unity Localization
The Localization asset comes packed with a lot of out-of-the-box components that make it effortless to add translations to your games. This page assumes you're a bit familiar with its workflows. You can learn more about it at the Unity Localization Documentation
Display translations
This integration allows to localize not only texts, but also Sprites, Textures and even entire Game Objects, and in all cases it's the exact same workflow.
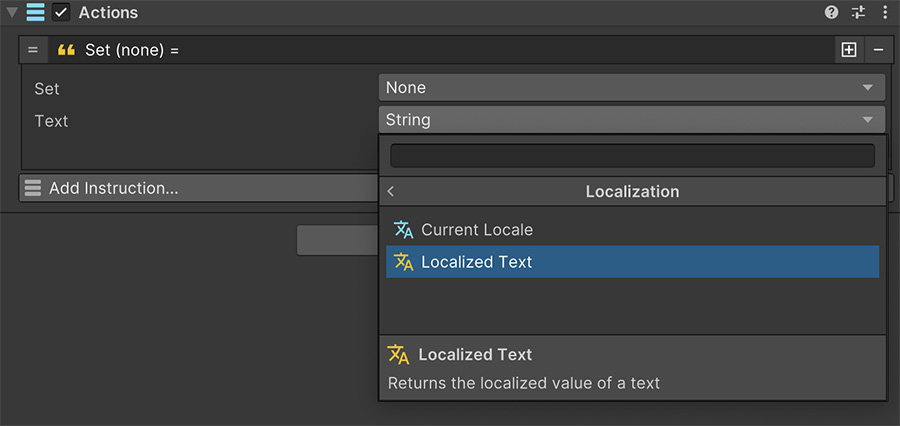
To display a localized Text use the Localized Text option from any of the text properties dropdown.

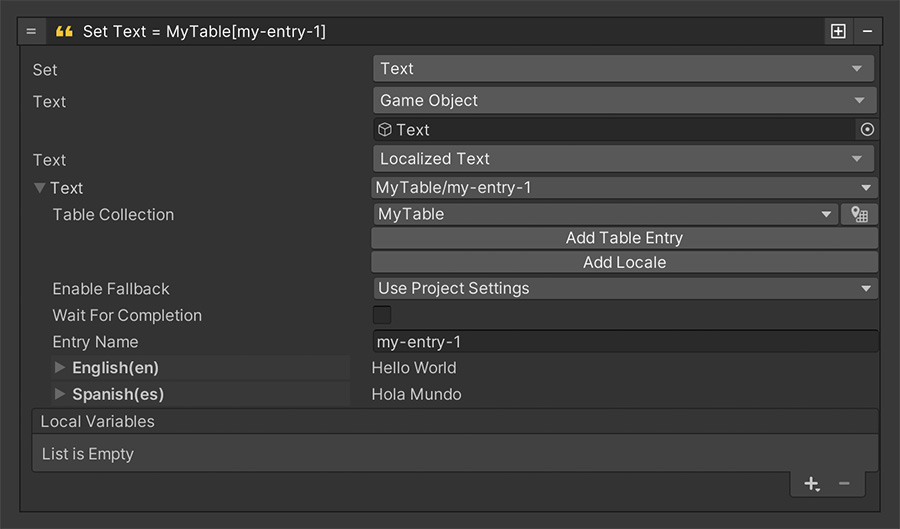
Once the property is created, you can choose a text entry from the Localization Table or create a new entry.

Node Title
After selecting the table entry or creating a new entry, the Instruction node title might not update its text. This is because Unity 2022.3 and previous versions use IMGUI to render some sections of Unity Localization. You can simply collapse and expand the instruction again to manually refresh the title.
Change the Language
To change the language (also known as Locale), you can use the Change Language instruction. It allows to type in a string value with the locale of the language to display.

About Locales
Locales are short strings that represent a language. For example, English is usually typed as en and Spanish as es . There are also regional locales, such as en-CA for Canadian English or en-US for United States English.
Detect Language Changes
To detect when the currently selected locale has changed, use the On Change Language event Trigger, which is executed every time a new language is selected.

Text Refresh
Depending on the scene, it might not be possible to update the texts displayed on screen to the new language. In these cases, it's best to simply reload the scene after changing the language, so all text and assets that are localized are re-constructed again with the new locale values.