States
The States system allows to dynamically blend in/out arbitrary animations or entire animator controllers at runtime. All that needs to be done is to specify which animation or controller a character should play, and which layer should it be assigned to.
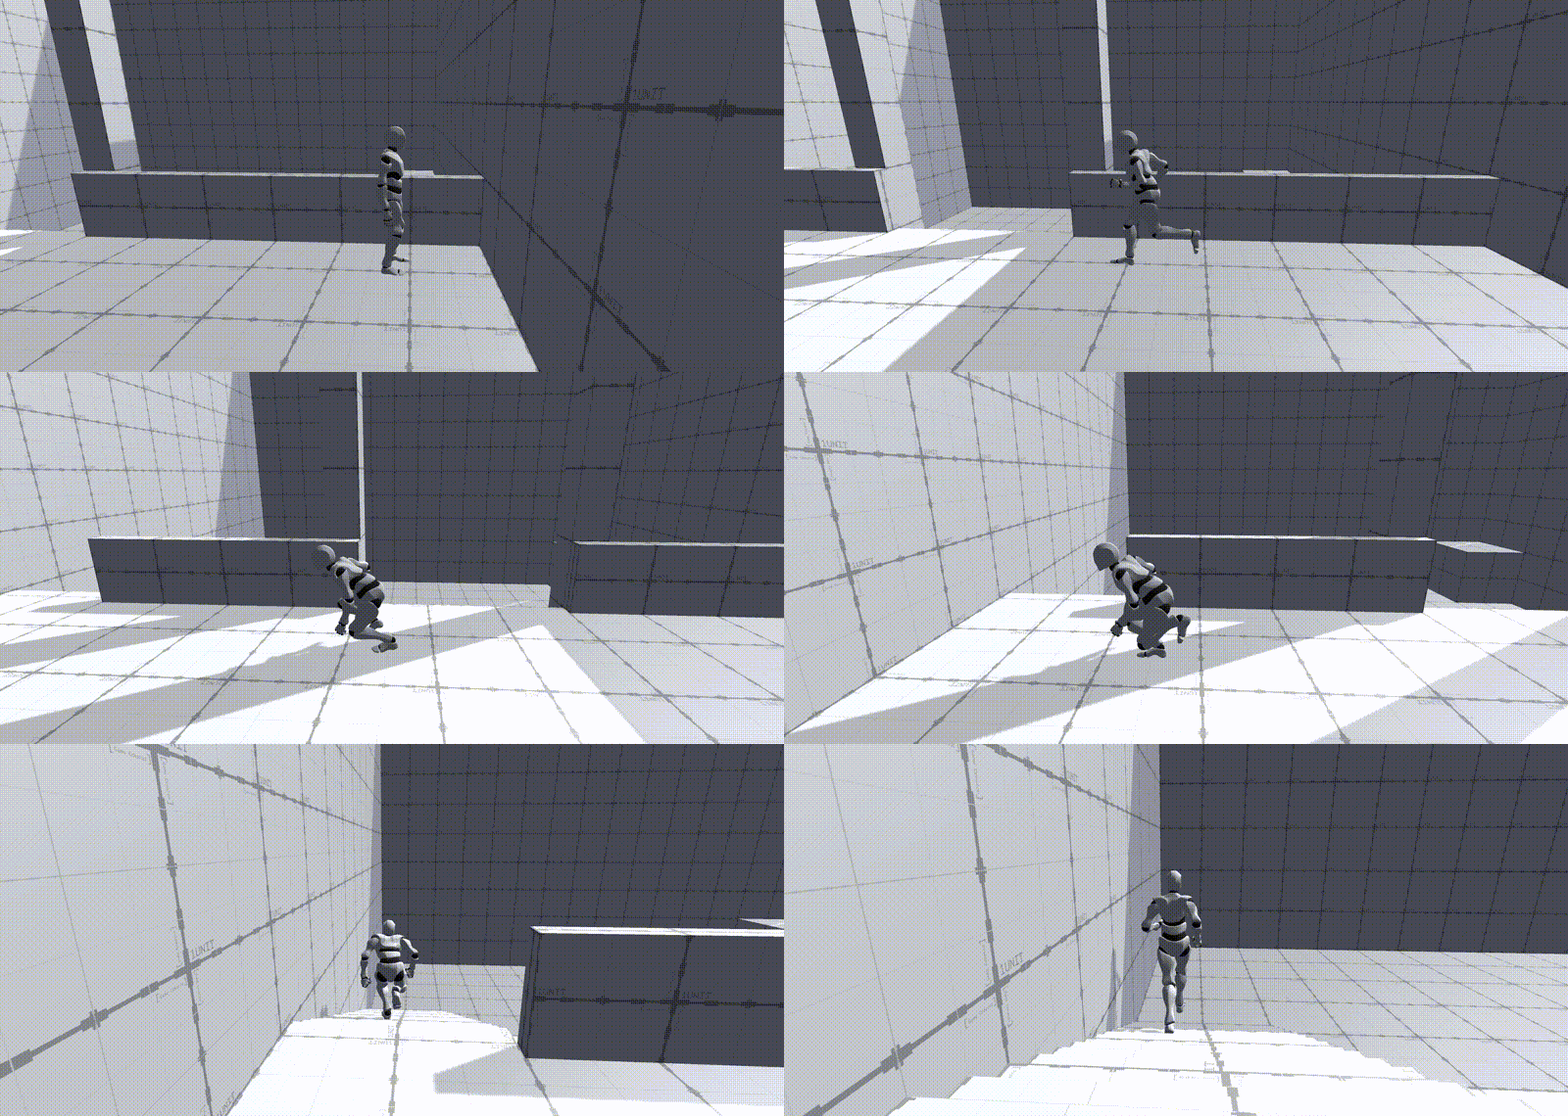
Mecanim vs States
It is important to note that the States system is built on top of Unity's Mecanim and it complements it; It does not prevent or restrict from using any of its features. It simply adds a new and more flexible workflow on top of it.
Types of States
There are primarily two types of States, but both work the same way: An instruction feeds a State to a Character and this one plays the animation/s based on the behavior of the State.
Animation States
Animation States are single animation clips that are played over and over again, until told to stop and blend out.
For example a character playing a single looped animation of sitting on a chair is an Animation State. These are the most common and basic forms of States, where an Animation Clip must be provided and the Character plays it in a loop.
It is also possible to create an Animation State asset that allows to play a looped animation as well as providing a fields for gestures that are played when entering and exiting the State. To do so, right click on the Project Panel and select Create → Game Creator → Characters → Animation State and drop the Animation Clip file onto the corresponding field.
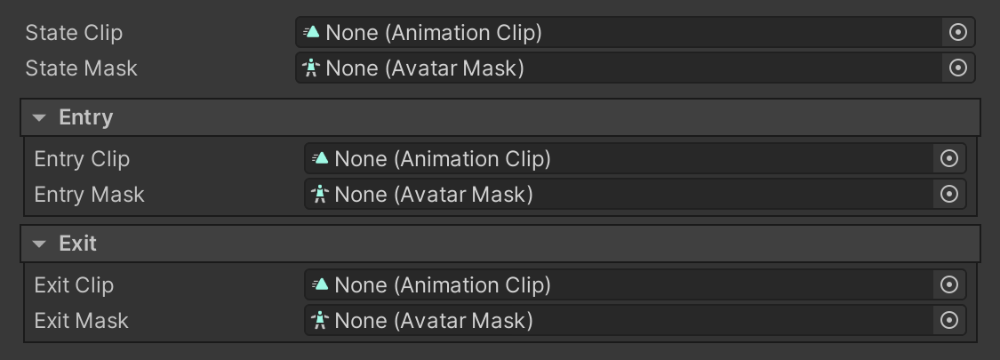
The State Clip field determines which animation is played in a loop, while State Mask discerns which body parts are affected by the animation. Note that this last field only works with Humanoid characters. See Avatar Mask for for information about masking animations.
The Entry and Exit sections contain optional fields that allow to play a Gesture right before entering or exiting the current State. For example, you may want a character to play the unsheathe sword animation every time it enters a sword combat stance, and play the sheathe animation when exiting the combat stance state.
On Refresh Instructions
Since version 2.5.20 there's an Instruction list at the bottom of any State asset called On Refresh. These instructions are called in order, from the lowest Layer to the upper-most one, any time a Character adds or removes a State.

Properties
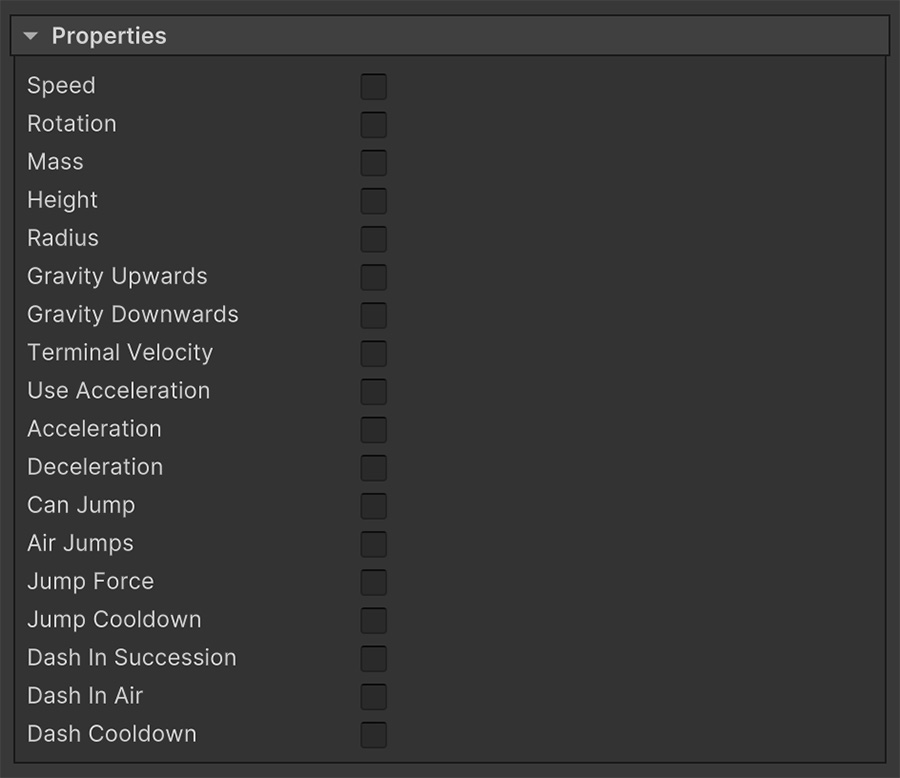
Since version 2.9.34 each State contains a Properties section that allows to modify common values from a Character, such as its linear and angular speed, jump options, gravity, etc...
Changing Movement Speed
This allows to change the move speed from within the State itself. For example, let's say we have the following States:
- Running State at layer 1 that sets the player's speed to 10
- Walking State at layer 2 that sets the player's speed to 5
The "Running" State properties will be called first, and afterwards the "Walking" State, because it's on a greater layer number. The second State will override the player's movement speed and set it to 5.
Removing the Walking State will run again the Properties values. However, this time, only the Running State properties are called, and thus the player's speed will be set to 10.
Locomotion States
These are more complex States that react to certain parameters such as the speed of a character, its direction and fall velocity. Locomotion States have multiple clips transitioning and blending with each other.
For example a character that idles in a prone position and crawls when the character moves is a Locomotion State.
To create a Locomotion State, right click anywhere on the Project Panel and select Create → Game Creator → Characters → Locomotion Basic State or Create → Game Creator → Characters → Locomotion Complete State.
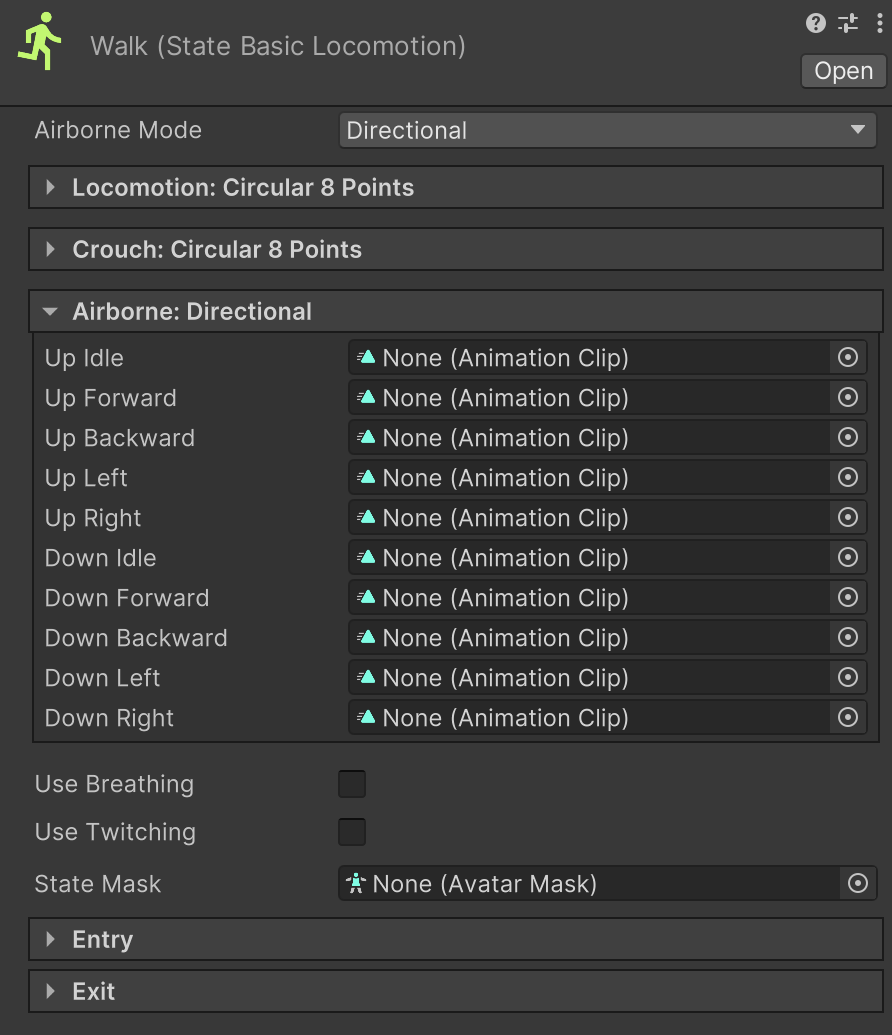
The Locomotion State asset may seem a bit daunting at first, but it's fairly straight forward. There are two types of Locomotion States and those are:
- Basic States: Have an idle and an 8-axis directional animation clip fields for moving
- Complete States: Have an idle and a 16-axis directional animation clip fields for moving: 8 for moving at half speed and another 8 for moving at full speed.
The first fields, Airborne Mode, controls the amount of animation clips available and can take one of the following values:
- Single: Displays a single animation clip for that particular phase.
- Circular 8 Point: Displays animation clip fields for the 8 cardinal directions: Forward, Backwards, Right, Left and each of the diagonals.
- Circular 16 Points: Displays animation clip fields for the 8 cardinal directions, and another 8 for half-way points between the first and the origin.
8 Points vs 16 Points
This decision comes down to the type of controller and animations available. If your game is meant to have analogic controls, the user might slightly push the movement joystick forward, making the character move slow. In this case, it is recommended using the Complete Locomotion State, as it allows to have both running and walking animations in a single State.
Layers
The States system is built around the concept of Layers, which is similar to the concept found in image editing tools, such as Photoshop. The idea is that any State is assigned a layer number. With higher numbers taking higher priority when playing an animation.
Example
Let's say we have a character with three Layers, each one with a single State, numbered 1, 2 and 10 respectively.
In this case, the animation played would be be the one found at the layer number 10. However, if this layer was to be removed, the animation at layer 2 would be the next one with highest priority and thus, its State would be played.
It is recommended to add a transition time when adding or removing a State from a Layer in order to smoothly blend between the new animation and the one underneath.
When adding a new State onto a Layer that already has a State, this last one will be smoothly faded out taking into account the new State's transition time, until it is replaced by the new one. After that happens, it will be automatically disposed.
Gestures and States
Note that although States can have different priorities, a Gesture animation will always have higher priority than any State and will play on top of it.
Weights
Setting a new State is not an all-or-nothing operation and the new animation can be blended by a percetage with any other animations playing underneath the stack.
For example, if a character is currently playing a running upstraight animation, a running crouched animation can be blended at 50% to to make the character look like it's running halfway between standing and crouched.
Weight at runtime
The weight can be modified at runtime using the Change State Weight instruction.
Entering a State
The easiest way to make a character enter an Animation or Locomotion State is using the Enter State Instruction.
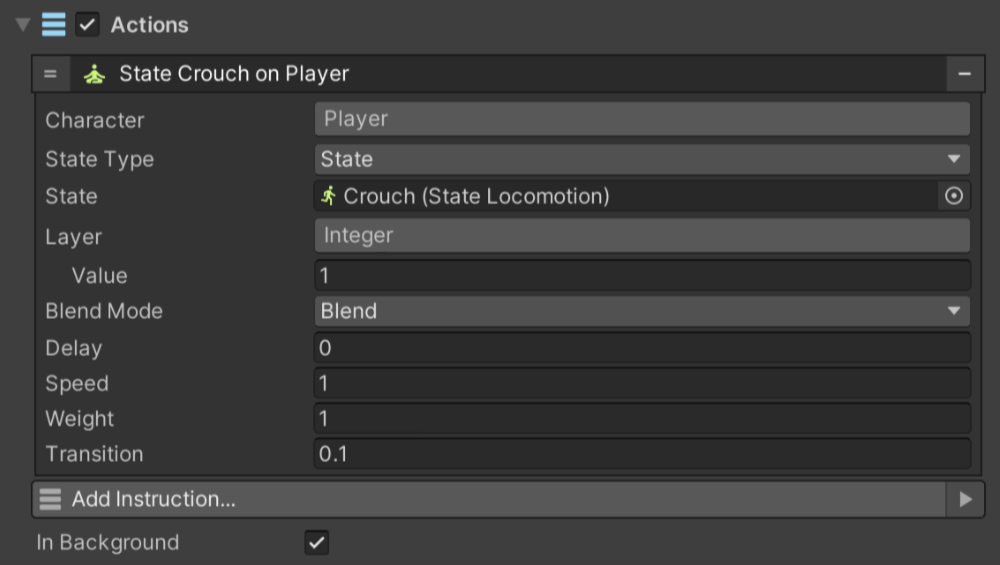
The Character field references the targeted character game object that enters the state. The State Type field determines whether the State is an Animation Clip, a State asset or a Runtime Animation Controller.
Runtime Animation Controller as a State
Game Creator allows to use a Runtime Animation Controller as a State. However, this is an advanced feature and should only be used if one understands how Gestures & States work under the hood.
The Layer field allows to determine which layer this State occupies in the Character's layer stack. Blend Mode by default is set to Blend, which overrides the underlying animation with the animations provided by the State. If set to Additive it adds up the new State's animation as a delta movement on top of any other animation being played.
The Delay field allows to delay in a few seconds the time to start playing the State. Speed is a coefficient value that determines how fast the State plays. For example, a value of 1 makes the State play its animation at its default speed. A value of 0.5 plays the animation at half speed and a value of 2 plays it twice as fast.
The Weight field determines the opacity of the State. A value of 1 plays the animation as it is. Lower values allow any previous animations to bleed through and mix the effect between the new State and any other animation being played in lower layers.
The Transition field is the time in seconds that the new State takes to fade in.
Exiting a State
The instruction Stop State can be used to smoothly stop playing a State on a character.
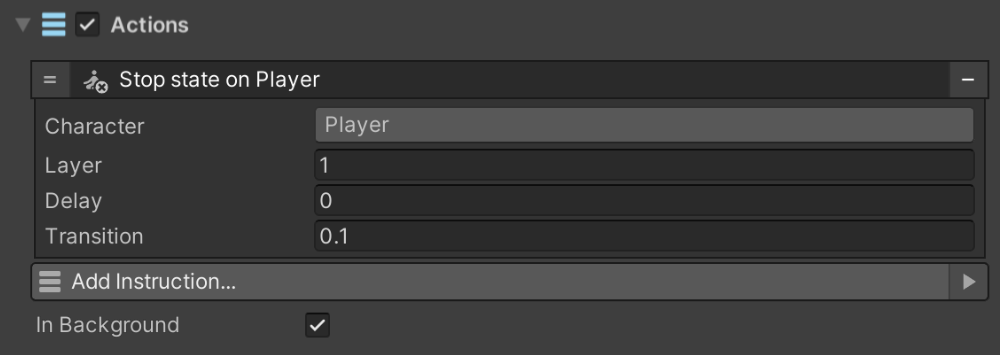
The Character field determines the targeted game object that stops playing a State found at the layer identified by the Layer number field.
Similarly, the Delay and Transition fields allow to delay the fading of the State by a certain amount of seconds.

