Component
The Character system is built using a single component called Character component and handles everything a character can do; From playing animations to footstep sounds, modifying animations though inverse kinematics and much more.
General Settings
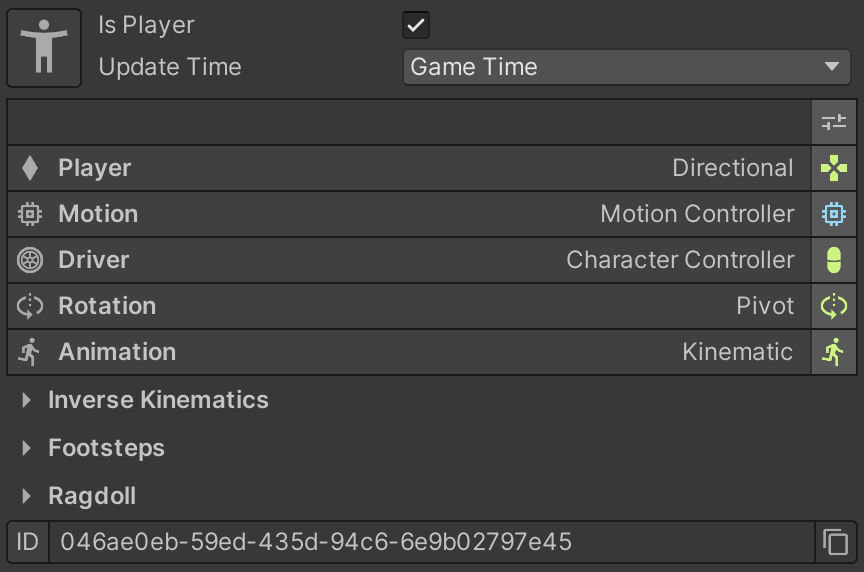
This block includes the big mannequin icon and two fields:
- Is Player: Determines whether this character is a Player character or not. A Player character processes input events and makes the character respond accordingly.
- Update Time: Indicates whether the character should work with the internal game's clock the real-life clock.

Game Time vs Unscaled Time
By default all characters should use the game's clock. Setting the game's time scale to zero will freeze the game, which is useful for pausing it. However if your game has a mechanic where a character ignores the time scale, you can use the unscaled real-life clock.
The mannequin icon isn't just an aesthetic ico, but a debugging tool. When the game is running, the icon will change into a green colored one and will turneach of its limbs red every time the character performs a blocking action that prevents that limb from doing something else. For example, performing a jump makes the legs be busy for a little less than a second, as well as landing.
The mannequin icon will change into a red skull when the character is considered dead.
Kernel Settings
This block is the most important one. A Character behavior is divided into 5 main categories (known as Units) and each one can be changed individually without affecting the rest.
Names
This settigs block is called the Kernel of the character and each individual row is called a Control Unit or Unit for short.
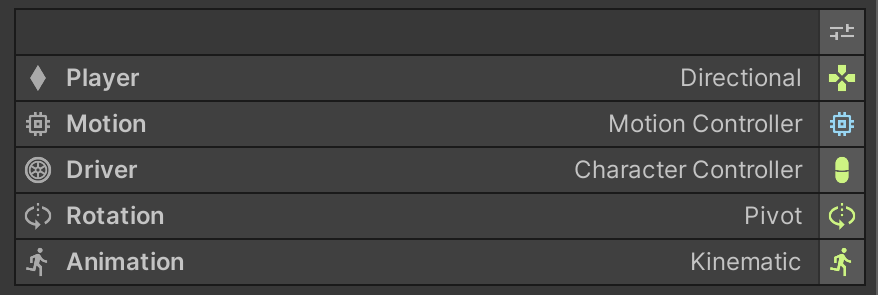
To change each type of Unit click on the right-most icon of each and choose the implementation you want. Clicking on the name of the Unit will expand/collapse its available options.
Custom Character Controllers
Game Creator comes with a collection of Units so you can customize how you want your characters to work. However, these lists are not fixed and can be extended via code. As Game Creator grows, so will the amount of options available. If you are a programmer you can create Unit that integrates a third-party character system. To know more about extending the Character component see the Character Controller section.
Player
The Player unit controls how the character is controlled by the user. It only affects the character if its Is Player checkbox is enabled. Game Creator comes with a bunch of different Player units the user can choose from:
- Directional: The character moves relative to the main camera's direction and reacting to the keyboard's WASD keys or any Gamepad's Left Stick. This is the most common control scheme for most games.
- Point & Click: The character moves towards the point in space click with the mouse cursor. If the Driver is set to Navigation Agent, the character will try to reach the clicked position avoiding any obstacles along its path.
- Tank: Pressing the advance key will make the character move forward in their local space, regardless of the main camera orientation. This option requires the Tank option as its Rotation unit.
Motion
The Motion unit defines a character's properties and what it can or can't do. It comes with a list of options that can be modified both in the editor and at runtime.
Singular Unit
Game Creator comes with just a single Motion unit called Motion Controller. Unless the character is implementing a custom character controller, the Motion unit shouldn't be changed to anything else.

These options are:
- Speed: The maximum velocity at which the character can move. In Unity units per second.
- Rotation: The maximum angular speed at which the character can rotate. In degrees per second.
- Mass: The weight of the character. In kilograms.
- Height: How tall the character is. In Unity units.
- Radius: The amount of space the character occupies around itself. In Unity units.
- Gravity: The pull force applied to the character that keeps it grounded.
- Terminal Velocity: The maximum speed reached by a character when falling.
- Use Acceleration: Determines if the character accelerates/decelerates when moving. If set to false, the character will start moving at full speed.
- Acceleration: How fast the character increases its velocity until it reaches its maximum speed.
- Deceleration: How fast the character decreases its velocity until it stops.
- Can Jump: Determines if the character can execute a jump.
- Air Jumps: The number of double jumps the character can perform in mid-air. Most games allow zero or up to one air-jump.
- Jump Force: The vertical force used when executing a jump.
- Jump Cooldown: The minimum amount of time that needs to pass between each successive jump. Useful to prevent the user from spamming jumps.
The Motion unit also has the Interaction section at the bottom, which allows to configure how the character can interact with elements from the scene.
Driver
The Driver unit is responsible for translating the math of the processed motion data into actual movement. Depending on the controller type the character will move slightly different.
- Character Controller: The default unit. It uses Unity's default Character Controller which provides a versatile controller which should work fine for most cases.
- Navmesh Agent: It uses Unity's Navmesh Agent as the character controller. It allows to avoid obstacles when moving a character to a point in space but has the con that prevents the character from being able to jump.
- Rigidbody: It uses Unity's Rigidbody component so the character is affected by external forces using Unity¡s Physics Engine.
Axonometry Settings
Since version 2.9.36 the Driver unit comes with an Axonometry field that allows to post-process the character movement and constrain by some rules. These rules can be:
- Side-Scroll XY: The character can only move within the X axis and gravity affects the Y axis. Locked on zero in Z axis.
- Side-Scroll YZ: The character can only move within the Z axis and gravity affects the Y axis. Locked on zero in X axis.
- Isometric 8 Directions: The character can only move around the XZ plane in multiples of 45 degrees.
- Isometric Cardinal: The character can move north, south, east and west.
- Isometric Ordinal: The character can move in diagonals from world-space perspective.
Rotation
The Rotation handles how the character rotates and its facing direction at any time. There are multiple Units available by default although the most common one is the Pivot.
- Pivot: The character rotates towards the direction it last moved to.
- Pivot Delayed: Very similar to Pivot but the character waits a few seconds before it starts rotating towards the direction it's moving. This option looks best for slow-paced movements, like walking slowly, sneaking or crawling.
- Look at Target: The character always faces towards an object in the scene and wil strafe when moving sideways relative to the object. This option is most used when locking onto enemies.
- Object Direction: The character faces the direction of another object. This is mostly used third and first person shooting games where the character must look straight towards where the camera aims so the weapon's direction is aligned with the camera's point of view.
- Towards Direction: The character faces a 3D world-space direction. Mostly used in games on-rails or infinite runners.
- Tank: The character pivots around itself when pressing the specified buttons.
Switching at Runtime
It's important to highlight the fact that these options can be changed at runtime. For example, the player can use the Pivot unit when wandering the world but switch to a Look at Target unit when encountering an enemy. The character will seamlessly transition between them.
Axonometry Settings
Since version 2.9.36 the Rotation unit also comes with an Axonometry field that allows to post-process the character rotation and constrain it by some rules. These rules can be:
- Side-Scroll XY: The character can only look at right of left.
- Side-Scroll YZ: The character can only look forward or backwards.
- Isometric 8 Directions: The character can only rotate in multiples of 45 degrees.
- Isometric Cardinal: The character can rotate towards north, south, east and west.
- Isometric Ordinal: The character can rotate in diagonals from world-space perspective.
It's worth noting that both Driver and Facing Axonometry values should match for best results.
Animation
The Animation unit controls how the character model moves as a reaction of any internal or external stimulus and also manages the representation of the character's 2D or 3D model.
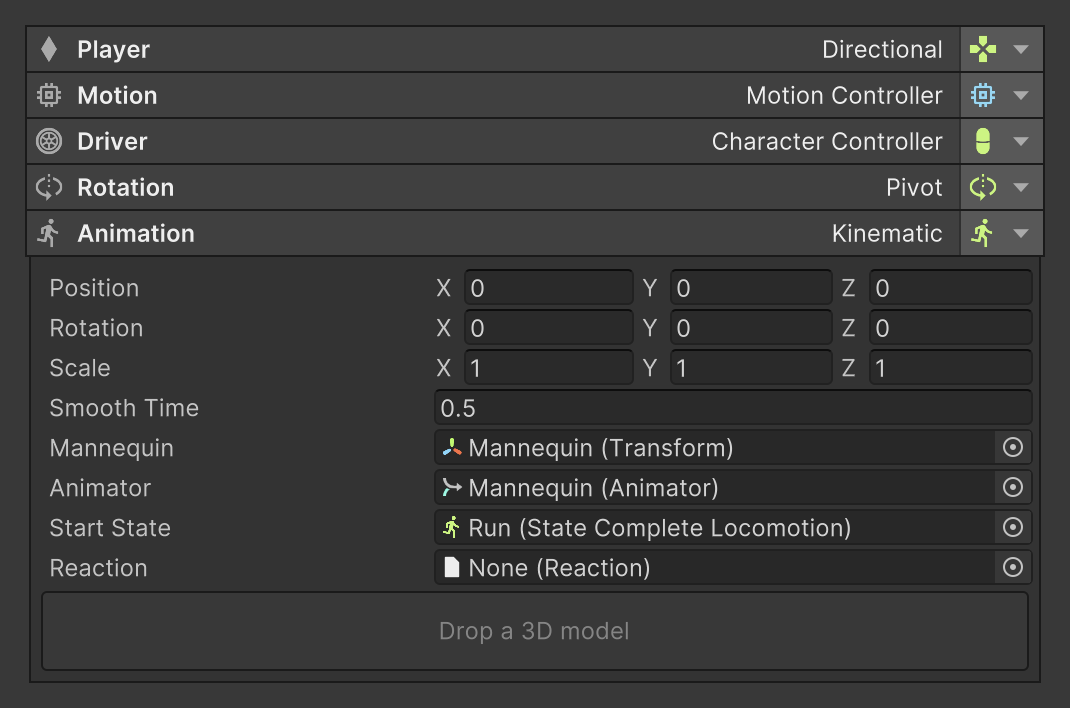
Just like the Motion unit, there is one single Animation unit option available called Kinematic which controls any generic character model's animations. There are different configuration blocks within the Kinematic animation unit:
- Position: Determines the local position of the mannequin inside the Character component. Rotation and Scale also change the transform of the mannequin in local space.
- Smooth Time: Determines how long it takes to transition between most character's animations, in seconds. Higher values make transitions look smoother but also take longer and feel less responsive. Lower values closer to zero make the character feel more responsive but also snappier.
- Mannequin: A reference to the intermediate game object between the root Character and the 3D model.
- Animator: The Animator component of the character's 3D or 2D model.
Runtime Animator Controller
The character's model Animator component should use Game Creator's Locomotion runtime animator controller or a custom controller that follows the same parameter names. To use a custom runtime animator controller it is necessary to implement a custom IAnimim unit (see Character Controller for more information).
-
Start State: Optional field that allows to set an initial character State. The starting state is set to layer number -1.
-
Reaction: An optional field that determines the default hit reaction for Shooter and Melee modules.
Still pose animations
Combining the breathing and twitching systems allows using single-frame still poses feel like fully-fledged animations, thanks to the additive breathing and twitching animations. In fact, Game Creator's default idle poses have a duration of a single frame. It's the twitching and breathing animations that make the pose look like it's real.
Extra Settings
The Character component has 3 extra sections at the bottom of the component which allow to control more specific parts of the character.
Inverse Kinematics
Inverse Kinematics (IK for short) allow characters to change their bone rotations in order to transform the overall structure and reach with the tip a targeted position and rotation. A common use of Inverse Kinematics is making sure the character correctly align their feet to the steepness of the terrain.

Game Creator allows to dynamically add or remove new IK systems onto each character individually and are processed from top to bottom. To add a new IK system simply click onto the "Add IK Rig Layer" button and select the option you want from the list.
Custom IK Rigs
You can also create your own custom IK systems. Check out the Custom IK section for more information.
The Character component comes with some common IK systems used on most games:
- Look at Target: This IK system allows characters to slightly rotate their head, neck, chest and spine chain in order to look at a specific point of interest. This is specially useful when paired with the Hotspots component. Requires the character model to be Humanoid.
- Align Feet with Ground: This IK system allows a character to automatically detect when the character is touching the ground and smoothly align their feet with the inclination of the ground. It can also lower the position of the hip so both feet touch the ground, in case the ground is very steep and one foot is higher than the other.
Footsteps
The Footstep system allows the character to signal when it has performed a step. This is useful when you want a character to leave a trail of footprints, play some particle effects simulating the dust of each step or playing a sound effect.
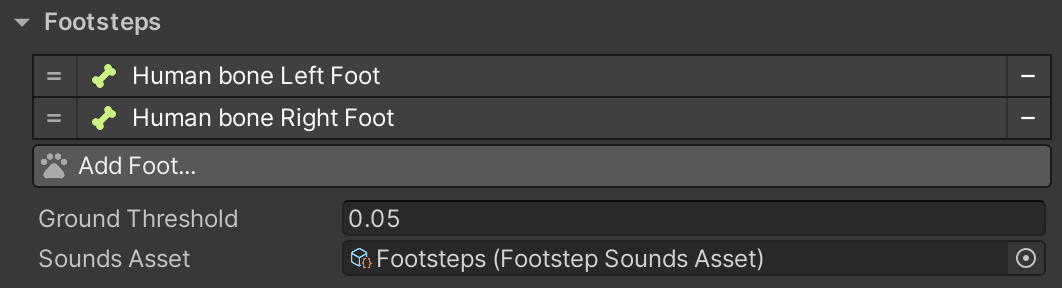
Humanoid and Generic characters
The Footstep system doesn't require the character model to be humanoid. It uses an array of objects that identify the character's feet bones. By default it assumes the character is a human and has two feet, but this can be easily customized clicking on the "Add Foot" button.
- The Sound Asset field references a Footstep Sounds asset that determines which textures play which sound effects. For more information about how to configure this asset see Footstep Sounds section.
Physically accurate sounds
The Footstep Sounds does not play the raw step sound effect but automatically distorts it in order for the player to hear different slightly different sounds each time. It also changes the pitch of the sound if there are multiple layers of textures, muffling those that are less prominent.
Custom Feet Phases
A Character's footsteps are determined by the feet phases (when the character touches ground with their feet). These values are driven by animation curves. If you want to use custom animations, you can download and use for free a custom tool for assigning feet phases clicking here.
Ragdoll
The Character component comes with a built-in Ragdoll physics system that allows to quickly turn any character into an inanimate object that reacts to physics with a set of constraints on each of its limbs.
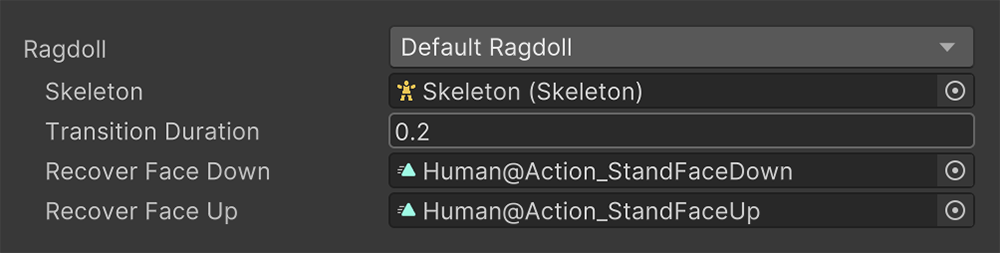
Skeleton asset
The Ragdoll system uses the Skeleton configuration asset to determine which parts of the model correspond to which bone. It can't work without one.
- Transition Duration: When a character recovers from a ragdoll state, it plays an animation based on the direction its body faces. This field determines the time it takes to blend between the ragdoll position to the animation clip being played when recovering.
Give plenty of transition time
It is recommended to use large transition values, above 0.5 seconds. The character's limbs can be in very awkward positions that doesn't match the initial pose of the recovery animation clip; so having small transitions will make the character appear to snap into an animation, instead of smoothly blending into it.
- Recover Face Down: The recovery animation played when the root of the character's ragdoll faces downwards.
- Recover Face Up: The recovery animation played when the root of the character's ragdoll faces upwards.
For more information check its dedicated Ragdoll section.