Traverse Interactive
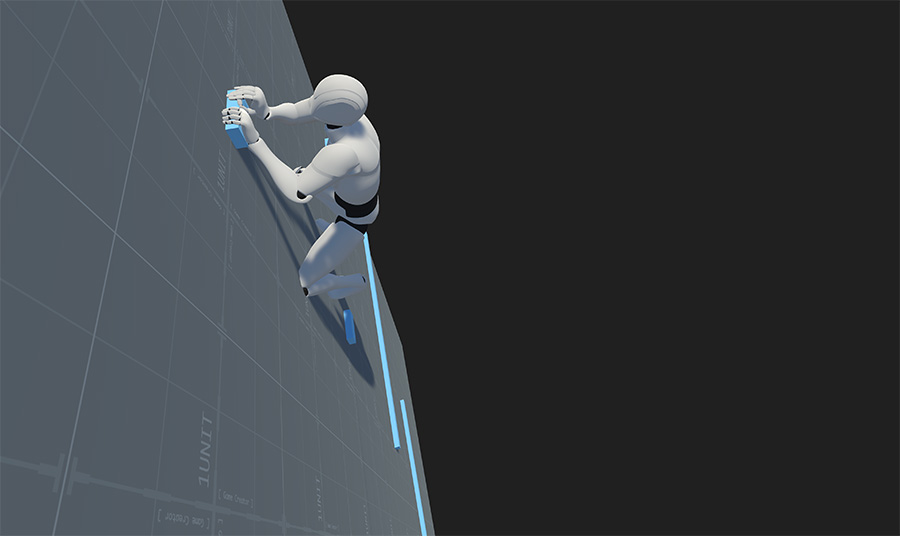
The Traverse Interactive component allows characters to enter in an interactive state where they can freely move along a pre-defined and constrained path.
Component
The Traverse Link component is divided into multiple sections that allow to customize its individual behavior.
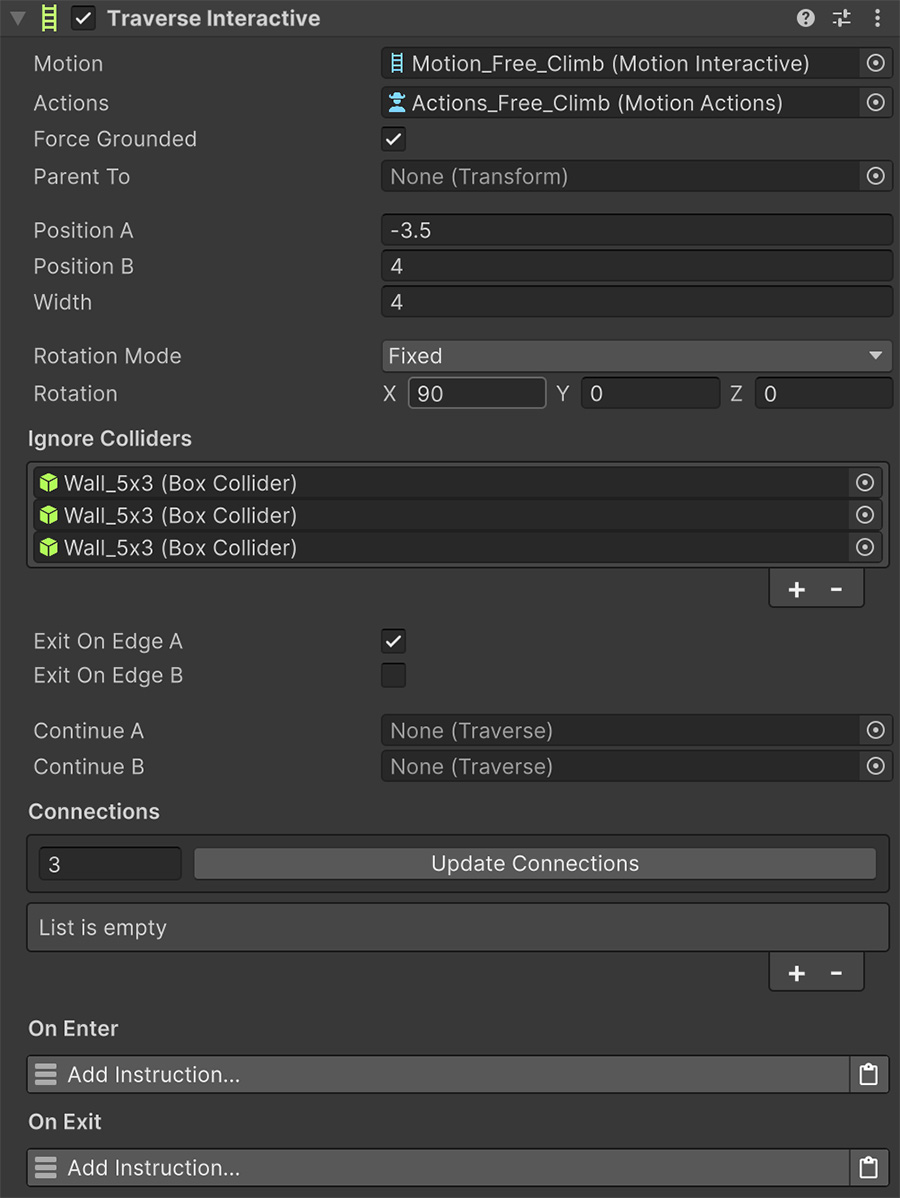
The Motion field must reference a Motion Interactive asset, which contains the shared logic between multiple Traverse Interactive components of the same type.
The Actions field is an optional reference to a Motion Actions asset, which allows a character to perform one or multiple actions while traversing the current Traverse Interactive.
Using Actions
The Motion Actions are explained more in detail in their own section, but it is worth noting that they are especially useful when making cover mechanics from where to shoot from.
The Force Grounded boolean will enforce the character to detect itself as being grounded, so the animations from the animation States are the grounded ones, instead of the airborne.
When to use Force Grounded
It is recommended that the Force Grounded toggle is used when the Gravity field of the Motion Interactive is set to zero. When characters have no gravity, even being close to the ground might report false positives, due to floating point precision errors.
The Parent To Transform field is optional and will temporarily parent the character onto the specified Transform component. Upon exiting the Traverse Interactive, the character will automatically re-parent itself back to its previous one (if any).
When to use Parent To
It is recommended to leave the Parent To field empty unless the motion uses an animation State and the Traverse Interactive component moves while the character is traversing it.
This is because characters detect motion relative to their parent. So for example, if a Traverse Interactive is moving right while the character is standing still, the character will understand it's actually moving right and play that animation. Parenting the character to the Traverse Interactive will prevent it and only take into account motion coming directly from the character itself.
The Position A and Position B points are points in local space that define the forward and backward bounds of the space in which the character can freely move.
The Width field determines whether the surface in which the character can move is a thin line, or an entire plane surface.
The Rotation Mode determines how the character rotates when moving along the bounds of the Traverse Interactive.
- None: The Traverse Interactive does not enforce any kind of rotation on the character.
- Path: The Traverse Interactive allows a rotation as long as it is along the path defined by the surface.
- Fixed: The Traverse Interactive enforces a very specific rotation in euler angles.
Rotation in Path
You can select what happens to the idle pose when selecting the Path option for Rotation Mode:
- Do Not Change: The rotation does not change when the character is standing still.
- Right: The character looks towards the Position A point when in idle.
- Left: The character looks towards the Position B point when in idle.
- Along: The character looks along the last direction moved on the surface when standing still.
The Ignore Colliders is a list of all the colliders that the character will ignore when traversing. This is especially useful when characters need to phase through a collider in order to move around the surface.
Example of Ignore Colliders
When climbing a wall, the character may need to penetrate the wall so legs and hands stick to the wall and does not appear as it is floating a few inches from the wall. In this case, it is a good idea to disable the collision between the character and the wall, so it can freely move on its surface.
The Exit on Edge A and Exit on Edge B allows characters to automatically let go of the Traverse Interactive component when they are at either the end-point of the bounds and pushing outside of it.
The Continue A and Continue B are optional fields that can reference other Traverse components (either a Traverse Link or a Traverse Interactive) and the character will automatically switch to those when pushing out of the edges of the surface.
When to use Continues
Continues are useful not only to make traversing more fluid without requiring the player to press a specific button to jump to another traversable, but also to change between seemingly similar obstacles.
For example, you may have a high wall that turns into a small one, half the height of the player. In this case, you can divide the cover into two Traverse Interactive cover objects that are seamlessly connected.
When the character is in a cover state, reaching the low-height zone can make the character automatically crouch, and stand when exiting the low obstacle.
The Connections field is a list of all possible candidates to reach when attempting to jump between them.
More about Connections
For more information about connections, see this section.
The On Enter and On Exit instructions are executed whenever a character enters and exits the Traverse Interactive component.
Self and Target
Note that whenever the On Enter or the On Exit instructions are called, the Self value will reference the Traverse Interactive game object and Target the character executing the movement.
Connections
Using a Traverse Interactive
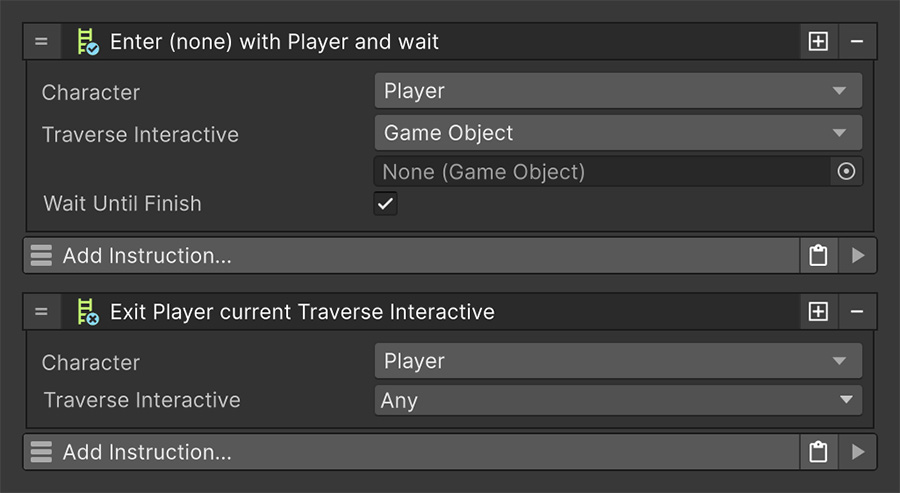
Traverse Interactive components can started and finished using the Enter Traverse Interactive and Exit Traverse Interactive instructions, respectively.
There are two ways to switch from one connection to another one.
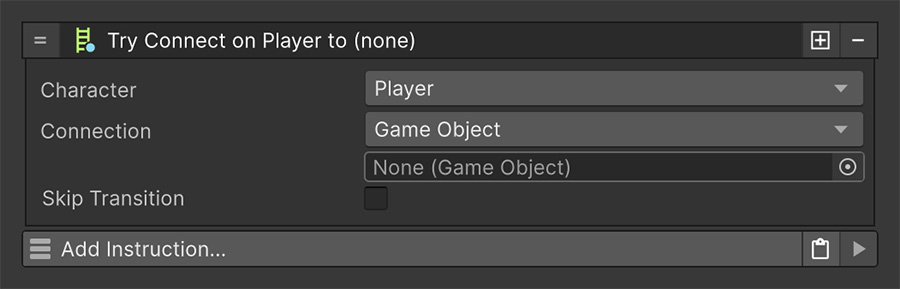
The easiest way is to use the Try Connect To instruction, which accepts a Character and a candidate game object with Traverse components at the specified object or as its children.
When this instruction is executed, it will check whether one of the candidate Traverse components is within reach and the Can Run condition is valid. If it is, it will exit the current Traverse Interactive and switch to the candidate.
Often you don't want to specify a particular Traverse component to switch to, but instead, try to switch based on a particular direction from the camera's perspective.
For this case there is an instruction called Try Connect by Direction which accepts a Character, a Camera and a Direction and chooses the best (if any) candidate to jump to.
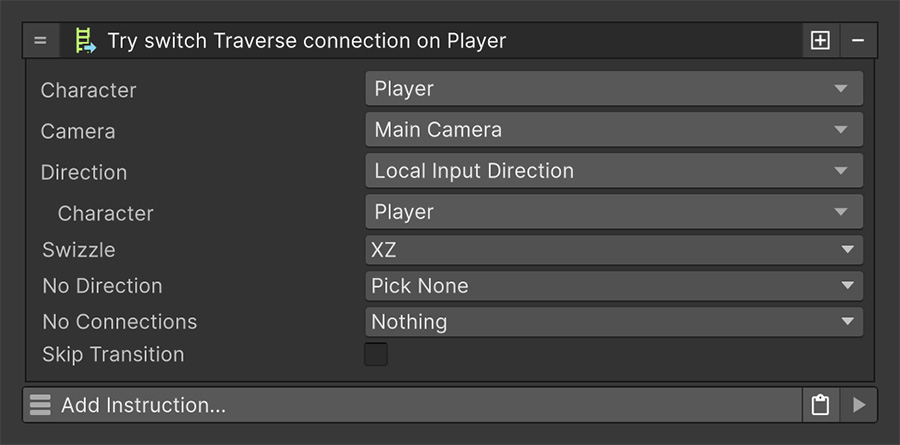
The Swizzle field allows to mix and change the direction axis components. Useful when the retrieved values are in the XZ axis but you want them as XY.
The No Direction field determines what happens if the direction is zero, meaning the player is attempting to move to a new Traverse but has not provided a direction.
- Pick None: It simply does nothing.
- Pick Closest: Picks the closest to the character.
- Try Jump: Attempts to jump using the Motion Actions settings, if any.
The Skip Transition field determines whether the transition animations are played or not when a valid candidate is found. Useful when the Traverse is very close and the animations are not needed.
In both instructions, if there are no available candidates or the available ones are not within reach, the instructions won't do anything.